Easiest Way to Install Next Cloud & OnlyOffice At Your On Premises – Full Privacy With Full Featured Document Server.
Contents
- 1 Overview
- 2 NextCloud Setup Process
- 2.0.1 Consider getting a domain
- 2.0.2 Install Ubuntu Server
- 2.0.3 Guidance Notes – Adding a user – After setting up Ubuntu Server, create a user for yourself if you don’t already have one:
- 2.0.4 Guidance Notes – Adding a user to the sudo group
- 2.0.5 Guidance Notes – Update packages
- 2.0.6 Guidance Notes – Clean up orphan packages. There may or may not be some orphaned packages. You can clean them up with the following command:
- 2.0.7 Guidance Notes – Set the hostname
- 2.0.8 Guidance Notes – Reboot to save all changes so far
- 2.0.9 Guidance Notes – Install tmux (optional)
- 2.0.10 Guidance Notes – Download Nextcloud
- 2.0.11 Guidance Notes – Set up database server
- 2.0.12 Guidance Notes – Create Nextcloud Database
- 2.0.13 Guidance Notes – Install required packages
- 2.0.14 Guidance Notes – Check status with systemctl
- 2.0.15 Guidance Notes – Enable recommended PHP extensions
- 2.0.16 Guidance Notes – Install zip and unzip nextcloud
- 2.0.17 Guidance Notes – Organize Apache files
- 2.0.18 Guidance Notes – Add Apache virtual host for Nextcloud
- 2.0.19 Guidance Notes – Enable the site
- 2.0.20 Guidance Notes – Configure PHP
- 2.0.21 Operating System :- Ubuntu 20.04:
- 2.0.22 Operating System :- Debian 10:
- 2.0.23 Guidance Notes – Enable required Apache mods
- 2.0.24 Guidance Notes – Configure Nextcloud
- 2.0.25 Guidance Notes – Enable memory caching
- 2.0.26 Guidance Notes – Correct permissions of config.php
- 2.0.27 Guidance Notes – Fix database indexes
- 2.0.28 Guidance Notes – Create an SSL certificate
- 3 OnlyOffice Setup Process to Nextcloud Server Using Another Ubuntu Server VM
- 4 Next Cloud Config file setting
- 5 Need Assistance
Overview
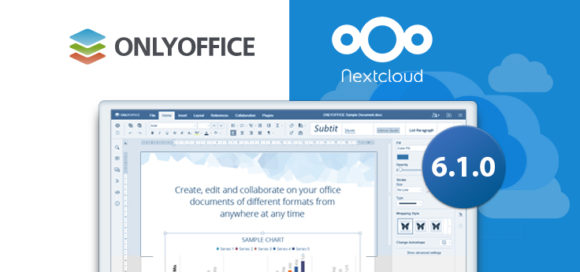
In this article, the reader can get how to set up a Nextcloud instance and onlyoffice instance and connect them to work smoothly like Gdrive at your own premises.
NextCloud Setup Process
Consider getting a domain
The article shows the process of setting up a domain. This is optional, but recommended.
Install Ubuntu Server
To get started, install Ubuntu Server on a VPS, physical server, virtual machine, or whatever you have.
Guidance Notes – Adding a user – After setting up Ubuntu Server, create a user for yourself if you don’t already have one:
Command : sudo adduser brsmtGuidance Notes – Adding a user to the sudo group
Command : sudo usermod -aG sudo brsmtGuidance Notes – Update packages
Command:
sudo apt update
sudo apt dist-upgrade
Guidance Notes – Clean up orphan packages. There may or may not be some orphaned packages. You can clean them up with the following command:
Command : sudo apt autoremoveGuidance Notes – Set the hostname
Command:
sudo nano /etc/hostname
sudo nano /etc/hosts
Guidance Notes – Reboot to save all changes so far
Command : sudo rebootGuidance Notes – Install tmux (optional)
This is an optional step, but running within tmux helps you avoid a situation where your SSH session disconnects in the middle of installing packages, which can cause package corruption.
Install the tmux package:
Command : sudo apt install tmuxActivate tmux with:
Command : tmuxGuidance Notes – Download Nextcloud
Go to: https://nextcloud.com/install/ Click “Download for server” and copy the link address.
On the server, download the Nextcloud zip file:
wget https://download.nextcloud.com/server/releases/nextcloud-20.0.6.zipNote: Change the URL in the command above to whatever the current download URL is for Nextcloud, this changes from time to time. Just grab the URL from the Nextcloud site.
Guidance Notes – Set up database server
Install the mariadb-server package:
Command : sudo apt install mariadb-serverGuidance Notes – Secure the installation with:
sudo mysql_secure_installationGuidance Notes – Follow the prompts to set up some very basic security defaults for the database server.
Guidance Notes – Create Nextcloud Database
Command:
sudo mariadb
CREATE DATABASE nextcloud;
SHOW DATABASES;
GRANT ALL PRIVILEGES ON nextcloud.* TO 'nextcloud'@'localhost' IDENTIFIED BY 'mypassword';
FLUSH PRIVILEGES;

CTRL+D to exit
Guidance Notes – Install required packages
Command : sudo apt install php php-apcu php-bcmath php-cli php-common php-curl php-gd php-gmp php-imagick php-intl php-mbstring php-mysql php-zip php-xmlGuidance Notes – Make sure apache2 is listed as a package in the list to be installed
Guidance Notes – Check status with systemctl
Command:
systemctl status apache2
systemctl status mariadb
Guidance Notes – Enable recommended PHP extensions
Command: sudo phpenmod bcmath gmp imagick intlGuidance Notes – Install zip and unzip nextcloud
Command:
sudo apt install unzip
unzip nextcloud-<version>.zip
Guidance Notes – Organize Apache files
Command :
mv nextcloud nc.brsmedia.in
sudo chown -R www-data:www-data nc.brsmedia.in
sudo mv nc.brsmedia.tv /var/www
sudo a2dissite 000-default.conf
sudo systemctl reload apache2
Guidance Notes – Add Apache virtual host for Nextcloud
Command:
sudo nano /etc/apache2/sites-available/nc.brsmedia.in.conf
<VirtualHost *:80 *:443>
DocumentRoot "/var/www/nc.brsmedia.in"
ServerName nc.brsmedia.in
<Directory "/var/www/nc.brsmedia.in/">
Options MultiViews FollowSymlinks
AllowOverride All
Order allow,deny
Allow from all
</Directory>
TransferLog /var/log/apache2/nc.brsmedia.in_access.log
ErrorLog /var/log/apache2/nc.brsmedia.in_error.log
</VirtualHost>
Guidance Notes – Enable the site
Command : sudo a2ensite nc.brsmedia.in.confGuidance Notes – Configure PHP
Operating System :- Ubuntu 20.04:
Command : sudo nano /etc/php/7.4/apache2/php.iniOperating System :- Debian 10:
Command : sudo nano /etc/php/7.3/apache2/php.iniGuidance Notes:- Parameters to adjust in php.ini file:
 memory_limit = 512M
 upload_max_filesize = 200M
 max_execution_time = 360
 post_max_size = 200M
 date.timezone = America/Detroit
 opcache.enable=1
 opcache.interned_strings_buffer=8
 opcache.max_accelerated_files=10000
 opcache.memory_consumption=128
 opcache.save_comments=1
 opcache.revalidate_freq=1
Guidance Notes – Enable required Apache mods
 sudo a2enmod dir env headers mime rewrite ssl
 sudo systemctl restart apache2
Guidance Notes – Configure Nextcloud
Browse to the Nextcloud server in your browser, and update the configuration to match the database info you’ve used earlier.
Guidance Notes – Enable memory caching
Edit the Nextcloud config file:
sudo vim /var/www/nc.brsmedia.in/config/config.phpAdd the following line to the end:
'memcache.local' => '\OC\Memcache\APCu',Guidance Notes – Correct permissions of config.php
sudo chmod 660 /var/www/nc.brsmedia.in/config/config.php
sudo chown root:www-data /var/www/nc.brsmedia.in/config/config.php
Guidance Notes – Fix database indexes
You may have to run the following to fix database indexes, if you see an error:
sudo php /var/www/nc.brsmedia.in/occ db:add-missing-indicesGuidance Notes – Create an SSL certificate
sudo add-apt-repository ppa:certbot/certbot sudo certbot --apache -d nc.brsmedia.in OnlyOffice Setup Process to Nextcloud Server Using Another Ubuntu Server VM
In this part, you can find, how to create OnlyOffice document server using ubunto 20.04 server and integrate it into NextCloud.
Step 1: Install ONLYOFFICE Document Server on Ubuntu
Guidance Notes – Install PostgreSQL from Ubuntu repository
Command:sudo apt install postgresql Guidance Notes – Then create the onlyoffice database.
Command:sudo -i -u postgres psql -c "CREATE DATABASE onlyoffice;" Guidance Notes – Create the onlyoffice user.
Command: sudo -i -u postgres psql -c "CREATE USER onlyoffice WITH password 'onlyoffice';" Guidance Notes – Grant permission.
Command: sudo -i -u postgres psql -c "GRANT ALL privileges ON DATABASE onlyoffice TO onlyoffice;" Guidance Notes: Both the username and password must be onlyoffice.
Guidance Notes – Install NodeJS from official repository – Add Node.js repostiory.
Command: curl -sL https://deb.nodesource.com/setup_12.x | sudo -E bash - Guidance Notes – Install Node.js.
Command: sudo apt install nodejs -y Guidance Notes – Install Redis server and Rabbitmq
Command: sudo apt install redis-server rabbitmq-server Guidance Notes – Check their status.
Command:
systemctl status redis-server systemctl status rabbitmq-server Guidance Notes – You should see they are active (running).
Guidance Notes – Install OnlyOffice document server
Guidance Notes – Add OnlyOffice repository
Command:
echo "deb http://download.onlyoffice.com/repo/debian squeeze main" | sudo tee /etc/apt/sources.list.d/onlyoffice.list Guidance Notes – Import OnlyOffice public key.
Command:
sudo apt-key adv --keyserver hkp://keyserver.ubuntu.com:80 --recv-keys CB2DE8E5 Guidance Notes – Update local package index and install OnlyOffice document server.
Command:
sudo apt update sudo apt install onlyoffice-documentserver Guidance Notes : During the installation process, you will be asked to enter PostgreSQL password for onlyoffice.
Enter “onlyoffice” (without double quotes).
– End –
Next Cloud Config file setting
Error when trying to connect (Host violates local access rules) Add below lines to next cloud config file.
allow_local_remote_servers' => true,Need Assistance
If you need professional assistance configuring your deployment, you can use our commercial support to help get you up and running.
Key Terms:
- Nextcloud ,
- Onlyoffice ,
- Open Source Software ,
- Ubuntu

