How to Install KDE Desktop Environment on Ubuntu
Contents
Install KDE desktop environment on Ubuntu
Before you start, let me tell you that there are different versions of KDE available, according to the need. We will see what are they and how to install them:
KDE Full
This is the complete KDE pack. It comes with the complete package and core KDE plasma desktop. If you want all of KDE goodness (and its dependencies), this is the what you would install. Since it is the complete pack (around 472 MB), it will take some time in downloading and installing. You can install it using the following command:
sudo apt install kde-fullKDE Standard
The standard KDE includes Plasma desktop with standard set of KDE apps such as Kate (default text editor), Konqueror (default web browser), Kget (Download Manager), KMail (email client), Dolphin (File Manager) etc. The whole package is around 182 MB in size. You can install it using the following command:
sudo apt install kde-standard KDE Plasma Desktop
This is just the minimal package of KDE with just the Plasma desktop, nothing else. No apps are installed by default. You can install them later at any time. Ideal in the case when you just want to give it a try. The download size is around 90 MB.
sudo apt install kde-plasma-desktop KDE Plasma Netbook [Discontinued]
No prizes for guessing that this is for netbooks. This light version was best suited with low end systems and netbooks are just that. It is not available anymore.
sudo apt install kde-plasma-netbook There is also a package named kubuntu-desktop. It includes all the packages included in Kubuntu. You may install it as well but it may (or may not) lead to conflicts with your existing GNOME desktop.
KDE Plasma desktop installation procedure
Whichever package you chose to install KDE Plasma desktop, the procedure should be similar to the steps mentioned here.
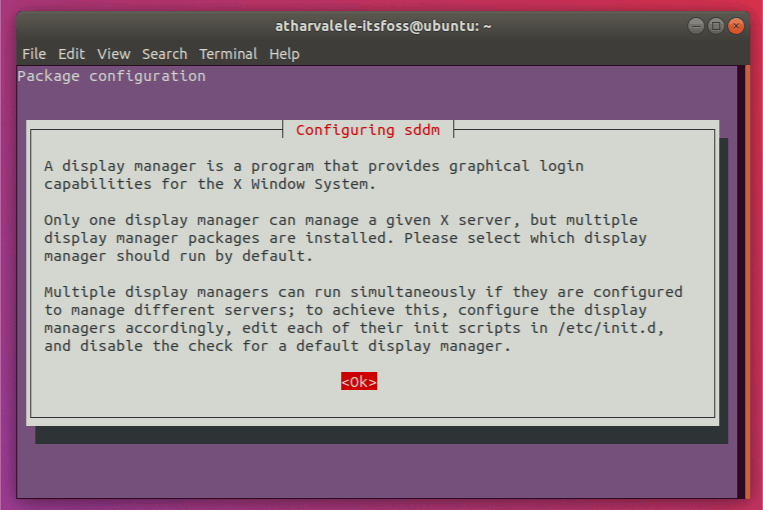
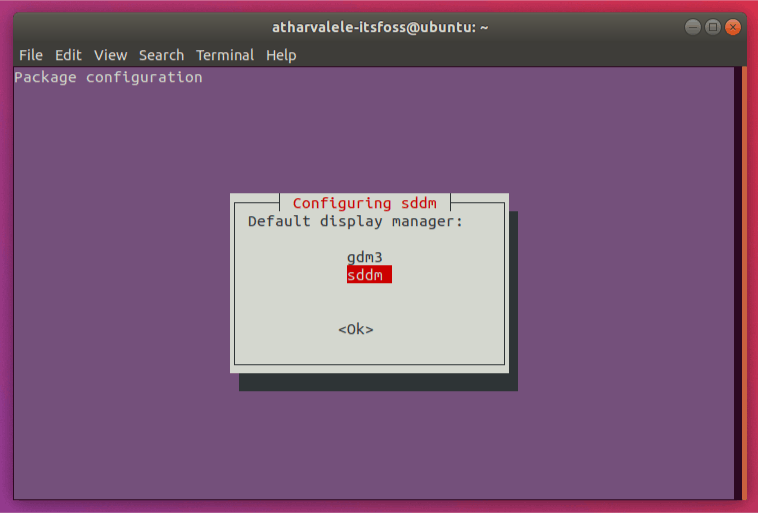
You’ll be prompted to configure SDDM, i.e. Simple Desktop Display Manager, which is the Display Manager used by the KDE Desktop. Select ‘sddm’ from the list and press Enter.


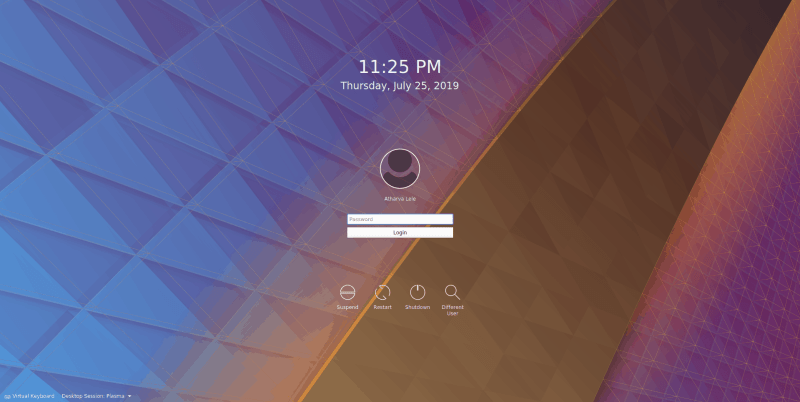
Once this is done, the remaining packages will be configured. After that, you can reboot. After the reboot, you will be greeted by the SDDM Lockscreen.

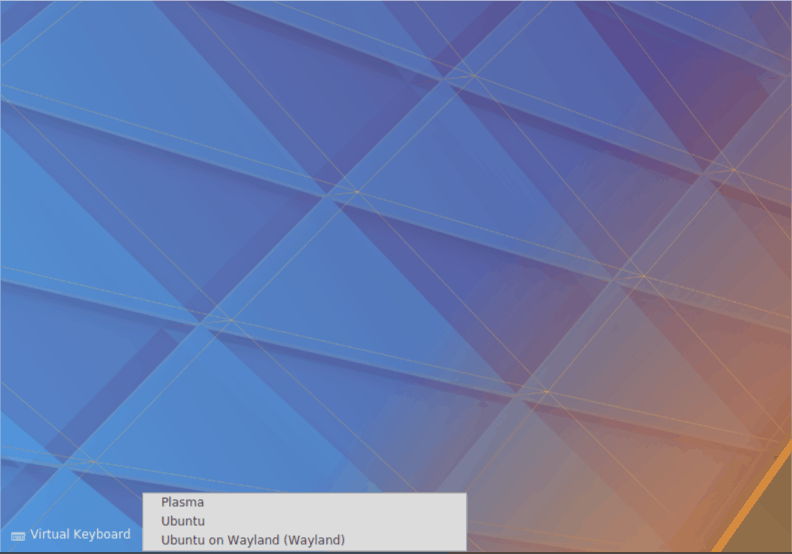
You can also select between KDE and GNOME using the “Desktop Session” option in the lower left corner.

The default GNOME Desktop will be available in the “Ubuntu” session. If you want to use the Wayland Display Server, you can select the appropriate option for that.
After logging in, you will be at the KDE Desktop Home. From here you can start using apps, and customizing it to your liking.

I, for one, love the traditional desktop experience as well as the customization provided by KDE. I hope this guide was helpful to you in installing KDE on Ubuntu.
How do you like your desktop to be? Simple or as customizable as possible? Let us know in the comments below, as well as drop any questions you may have.
Key Terms:
- Install KDE Desktop Environment ,
- KDE Full ,
- KDE Plasama Desktop ,
- KDE Standard


